
Running the viewer (rgbd-viewer)
- Binaries are in the
build/bin/directory, you can give it a try without calibration using:
build/bin/rgbd-viewer
If you get an error such as:
libusb couldn't open USB device /dev/bus/usb/001/087: Permission denied.
libusb requires write access to USB device nodes.
FATAL failure: freenect_open_device() failed
Give access rights to your user with:
sudo chmod 666 /dev/bus/usb/001/087
Or install the udev rules provided by libfreenect.
Switching between backends
There are two supported backends for Kinect devices, libfreenect and Open NI?/Nite. By default, if the NESTK_USE_OPENNI Cmake variable is enabled, demo programs will choose the OpenNI backend. If you want to switch to the libfreenect backend, you can use the freenect command line option:
build/bin/rgbd-viewer --freenect
High resolution mode
When using the OpenNI backend, you can enable high RGB resolution mode to get 1280×1024 color images @ 10Hz with the highres option:
build/bin/rgbd-viewer --highres
Running the viewer with calibration
- Just give it the path to the calibration file:
build/bin/rgbd-viewer --calibration kinect_calibration.yml
New since RGBDemo v0.4.0: if there is a kinect_calibration.yml file in the current directory, it will be loaded automatically.
- You should get a window similar to this:
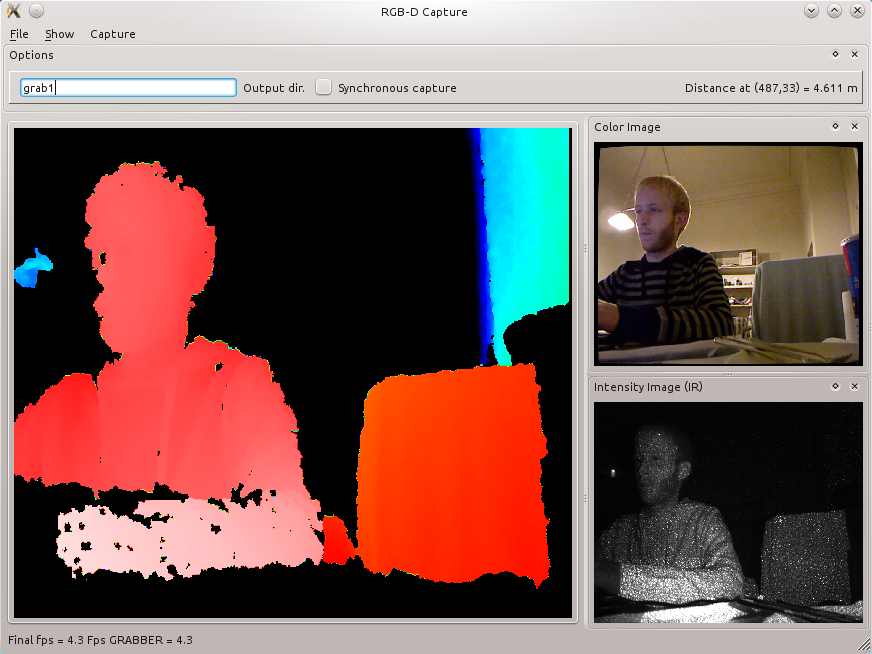
- The main frame is the color-encoded depth image. By moving the mouse, you can see the distance in meters towards a particular pixel. Images are now undistorted.
- You can filter out some value and normalize the depth color range with the filter window (Show / Filters). The Edge filter is recommended.

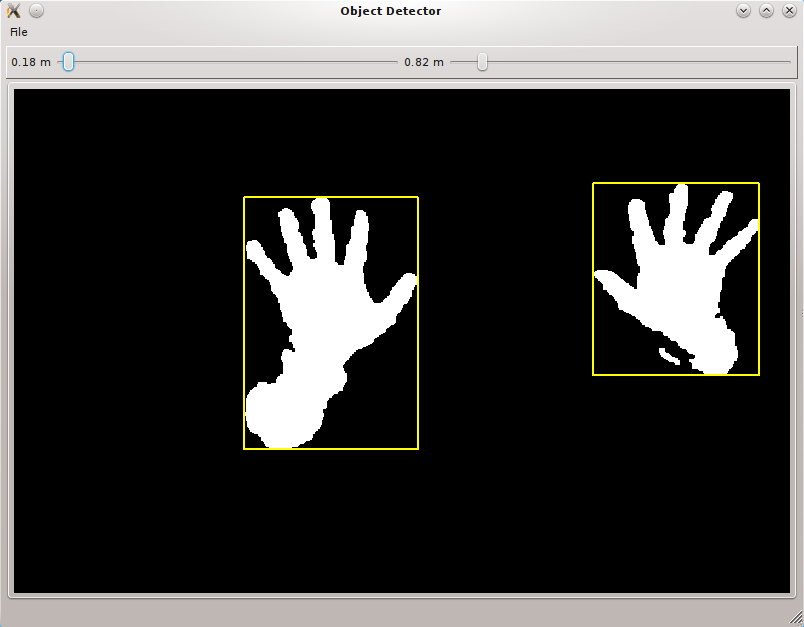
- You can get a very simple depth-threshold based segmentation with Show / Object Detector
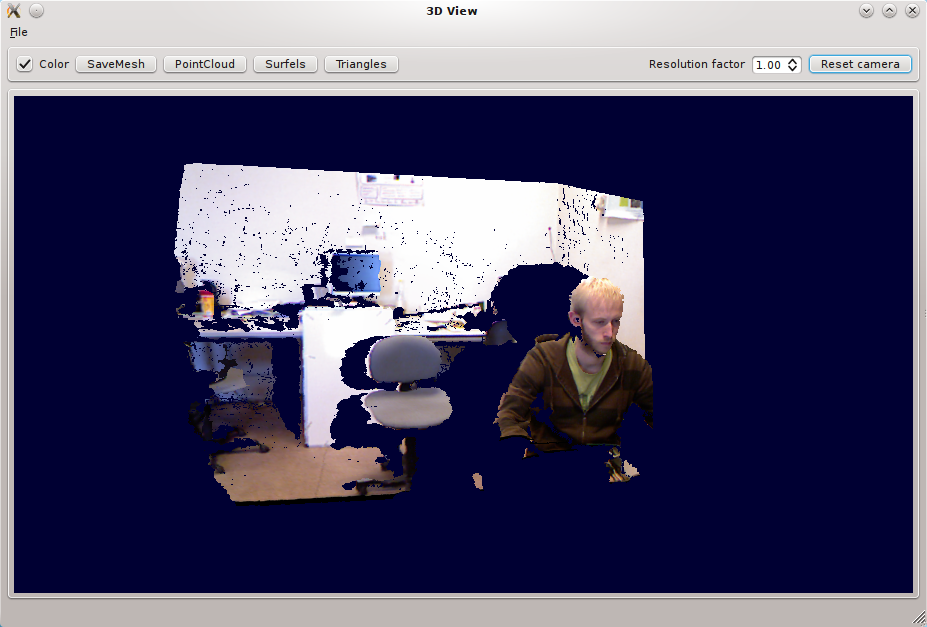
- You can get a 3D view in Show / 3D Window.
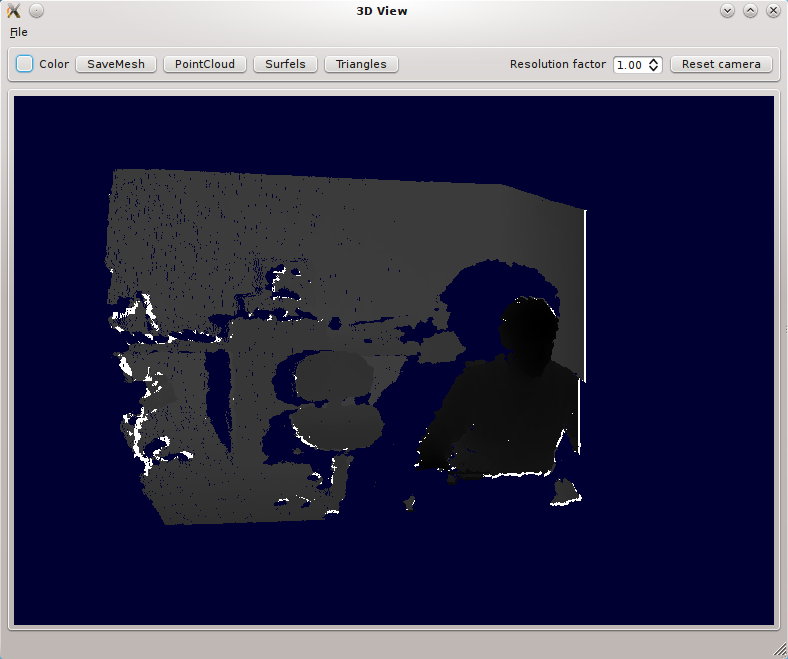
- By default you get a grayscale point cloud. You can activate color:
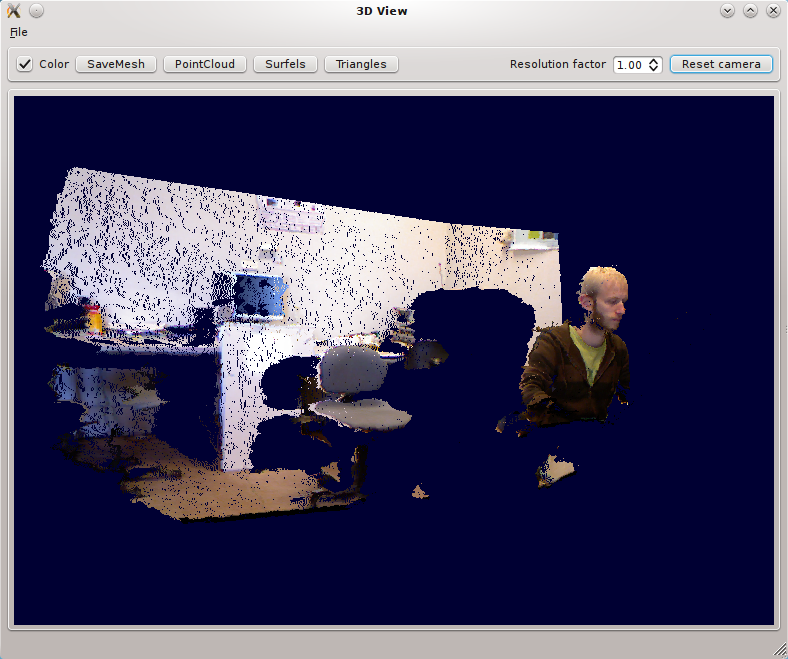
- And finally textured triangles :
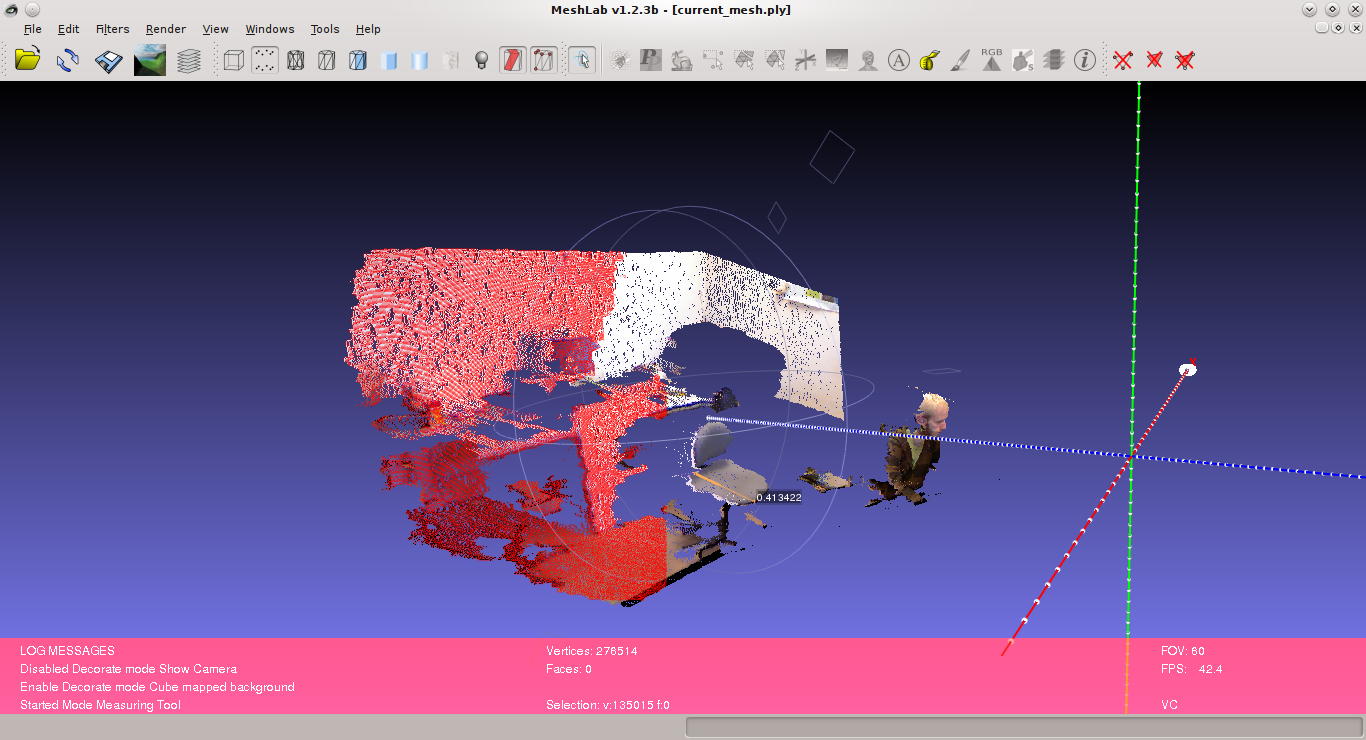
- You can also save the mesh using the
Save current meshbutton, it will store in into acurrent_mesh.plyfile that you can open with Meshlab Meshlab:
- Or import into Blender:
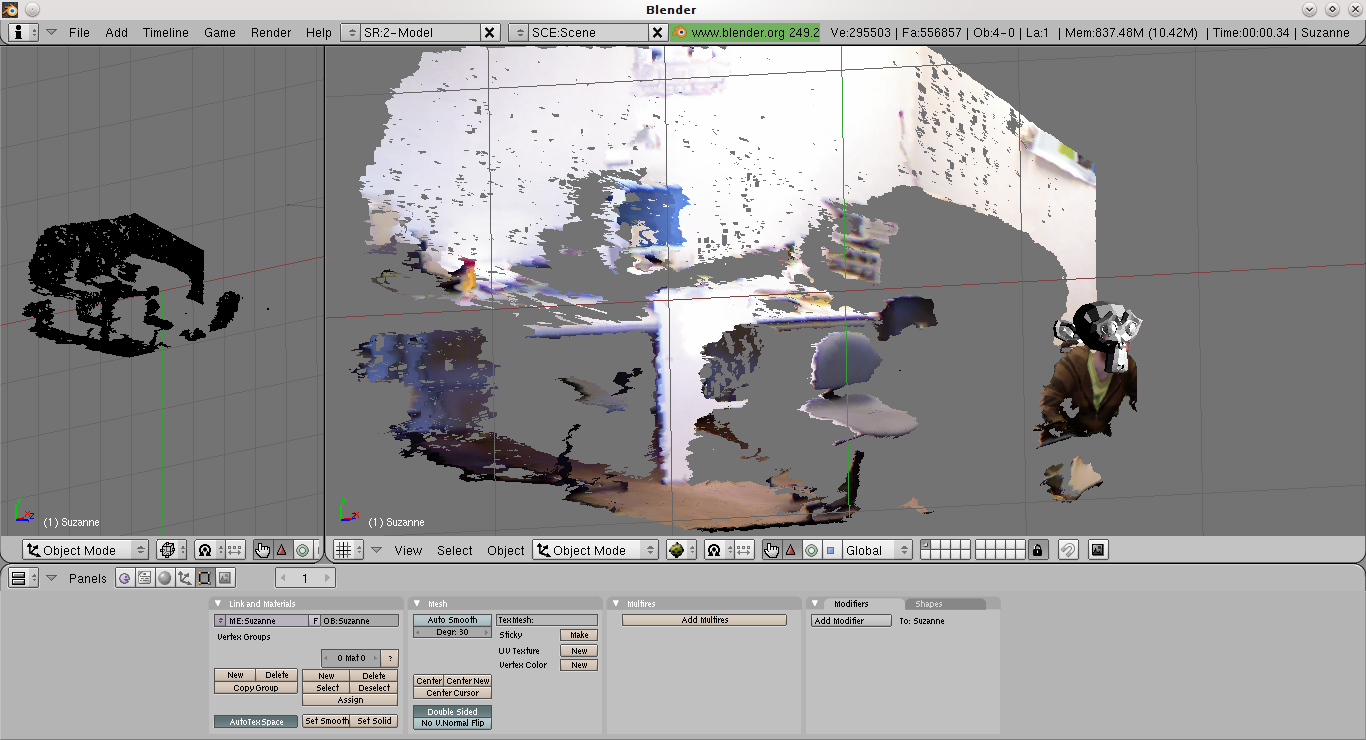
- The associated texture is written into a
current_mesh.ply.texture.pngfile and can be loaded into the UV editor in Blender.
Getting Infrared Images
- You can activate the IR mode in the capture menu. There is also a dual RGB/IR mode alternating between the two modes.
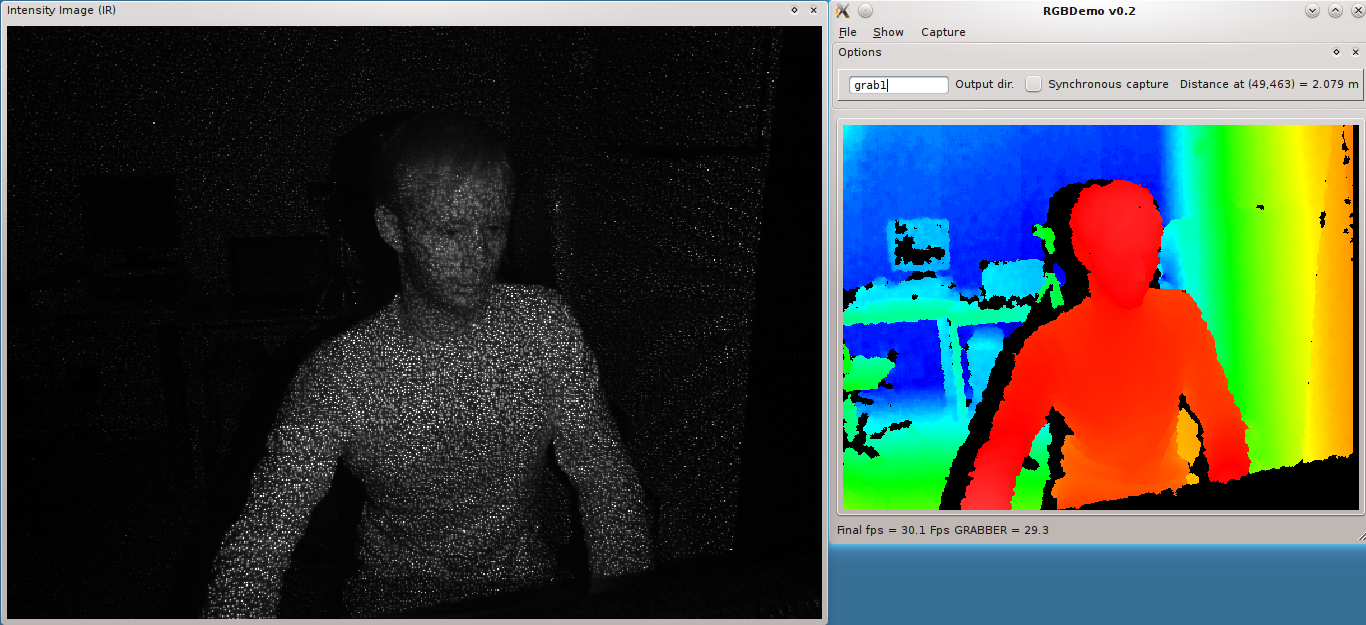
Note: this is currently only available with libfreenect backend
Moving the Tilt motor
This is only possible with the libfreenect backend. Open the Filters window and you can set the Kinect tilt on the bottom slider.
Replay mode
- You can grab RGBDImages using the
File/Grab Framecommand. This stores the files intoviewXXXXdirectories (see the Calibration section), that can be replayed later using the fake image grabber. This can be activated using the—imageoption:
build/bin/rgbd-viewer --calibration calibration-SERIAL.yml --image grab1/SERIAL/view0000
- You can also replay a sequence of images stored in a directory with the
—directoryoption:
build/bin/rgbd-viewer --calibration calibration-SERIAL.yml --directory grab1/SERIAL
This will cycle through the set of viewXXXX images inside the grab1/SERIAL directory, where SERIAL is the serial number of your Kinect.
Note: You will also need a calibration file if you used OpenNI backend to grab the images. You can get one by running the viewer and selecting File/Save calibration parameters.