
Documentation.Overview History
Show minor edits - Show changes to markup
(:htoc:)
Running the viewer (rgbd-viewer)
Running the viewer (rgbd-viewer)
Running the viewer (rgbd-viewer)
Running the viewer (rgbd-viewer)
(:title [=Kinect `RGBDemo v0.6.1=]:)
- Note: PCL support is required by this demo.
Using multiple kinects
- Launch
rgbd-multikinect. You need to plug each Kinect on a different usb hub. You can set the number of connected devices with the—numdevicesflag. Then you can switch between different devices using the number keys, or theDevicesmenu. A calibration file can be set for each device using e.g.—calibration2 calibration2.ymlto set the parameters of the second device. To calibrate the extrinsics of each Kinect, you can:
- Use the 3D view and check calibration mode to manually move the current view until it matches the reference one.
- Once you’re close to a good alignment, the “Refine with ICP” button can help to finalize the registration.
- Another option is to use the
calibrate-multiple-kinectsprogram. You will first need to grab images of checkerboards seen by both cameras using uncalibratedrgbd-multikinect. Then you can call the calibration program with, e.g.:
./calibrate-multiple-kinects grab0 grab1 calibration1.yml calibration2.yml --pattern-size 0.025
grab0 and grab1 are the directories containing the grabbed checkboards. grab0 correspond to the reference camera, and grab1 to the Kinect whose extrinsics will be computed. calibration1.yml and calibration2.yml are the calibration files containing the intrinsics of each Kinect. These can be obtained automatically from OpenNI by using File/Save Calibration Parameters in rgbd-multikinect after activating the corresponding device. These files are usually identical though. —pattern-size is the same as in the calibration section. If calibration is successful, a calibration_multikinect.yml file will be generated, containing the computed R_extrinsics and T_extrinsics matrices, respectively the 3D rotation matrix and the 3D translation vector of the second camera w.r.t. the first one.
This file can then be fed to rgbd-multikinect:
./rgbd-multikinect --calibration2 calibration_multikinect.yml --numdevices 2
Running the viewer with calibration
- Just give it the path to the calibration file:
build/bin/rgbd-viewer --calibration kinect_calibration.yml
New since RGBDemo v0.4.0: if there is a kinect_calibration.yml file in the current directory, it will be loaded automatically.
- You should get a window similar to this:
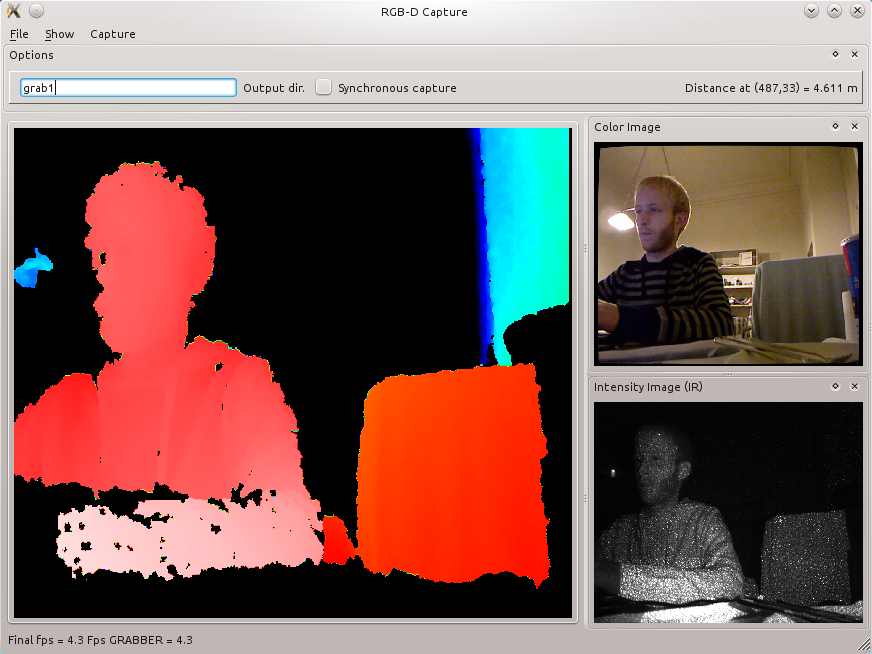
- The main frame is the color-encoded depth image. By moving the mouse, you can see the distance in meters towards a particular pixel. Images are now undistorted.
- You can filter out some value and normalize the depth color range with the filter window (Show / Filters). The Edge filter is recommended.

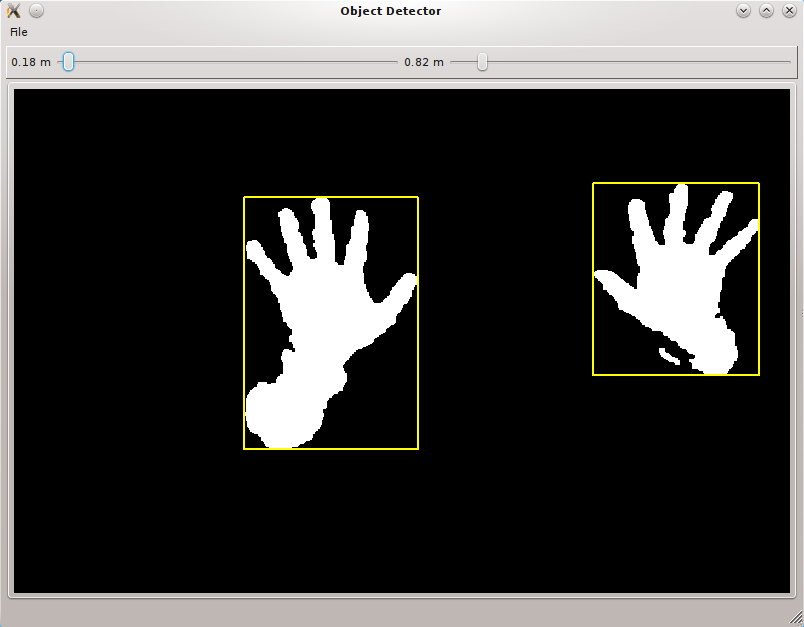
- You can get a very simple depth-threshold based segmentation with Show / Object Detector
- You can get a 3D view in Show / 3D Window.
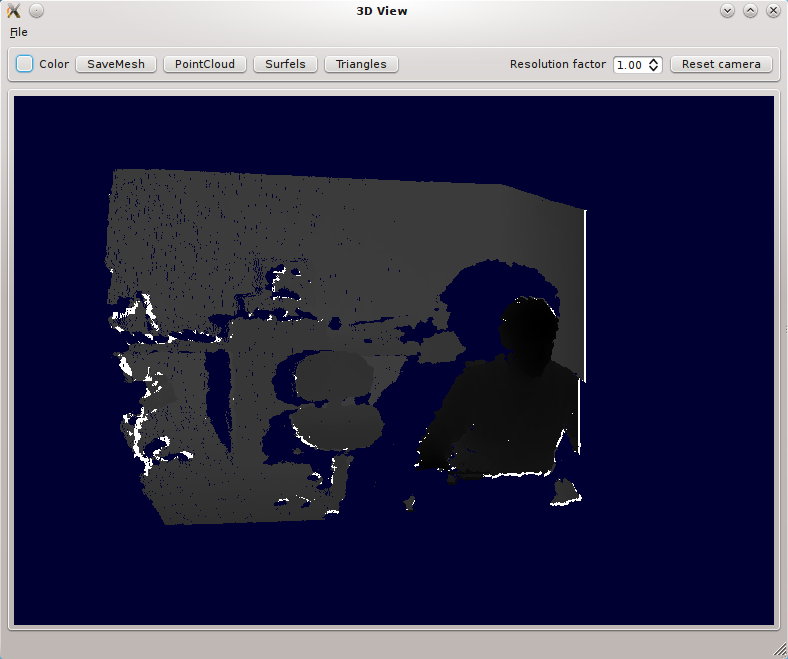
- By default you get a grayscale point cloud. You can activate color:
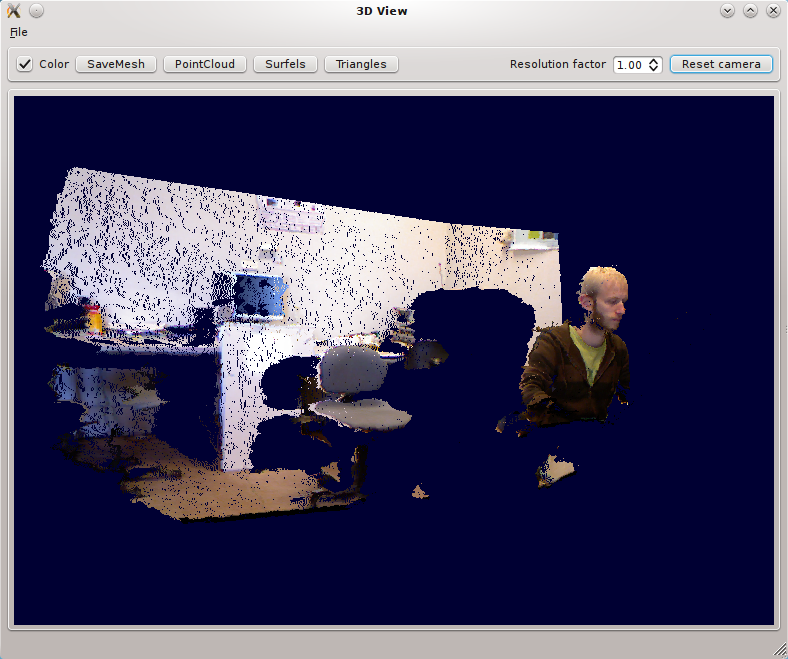
- And finally textured triangles :
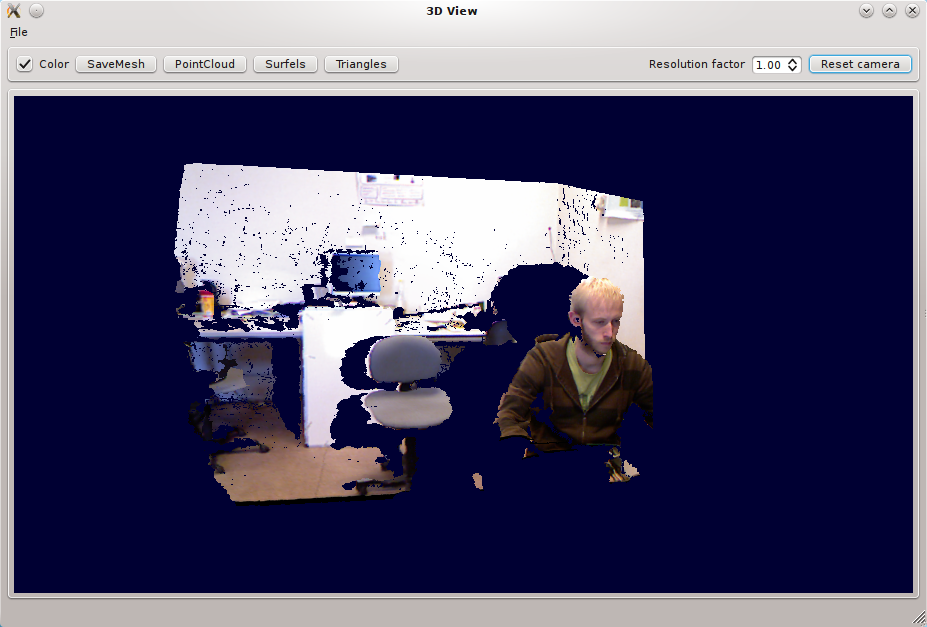
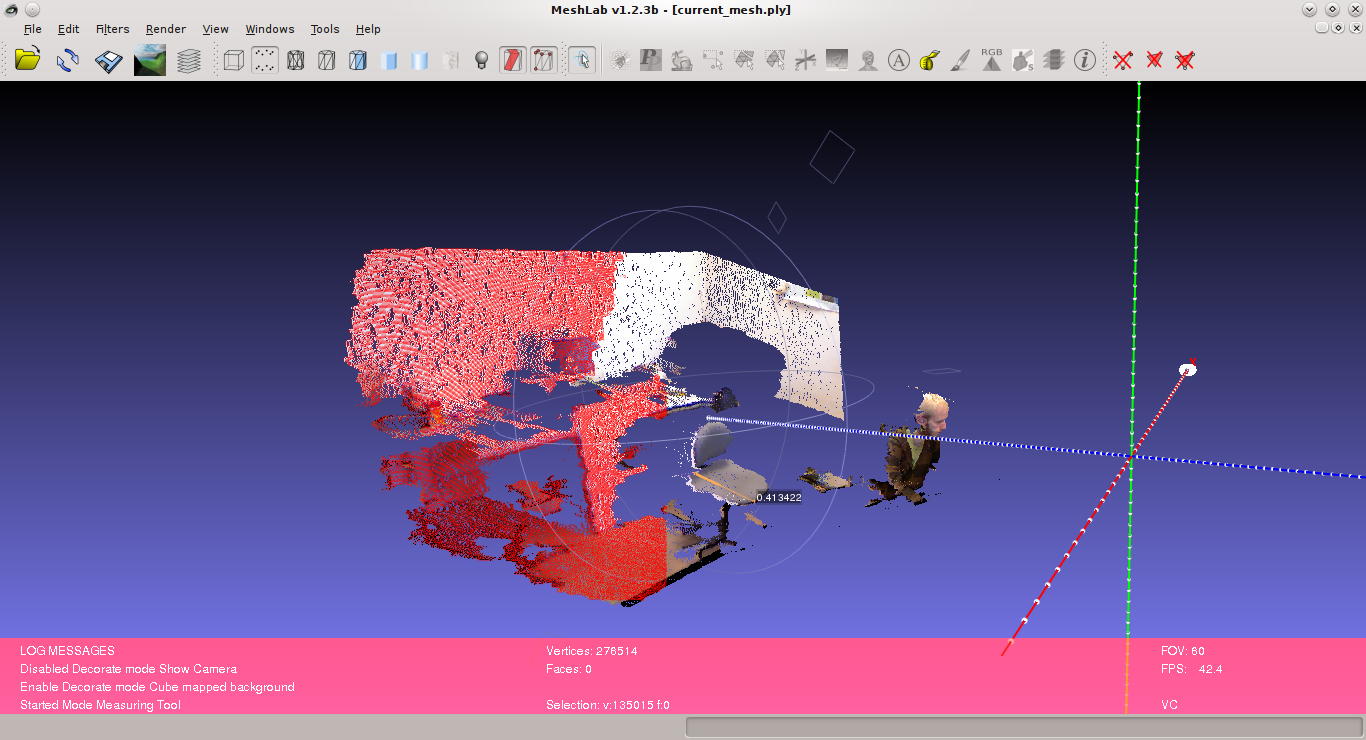
- You can also save the mesh using the
Save current meshbutton, it will store in into acurrent_mesh.plyfile that you can open with Meshlab Meshlab:
- Or import into Blender:
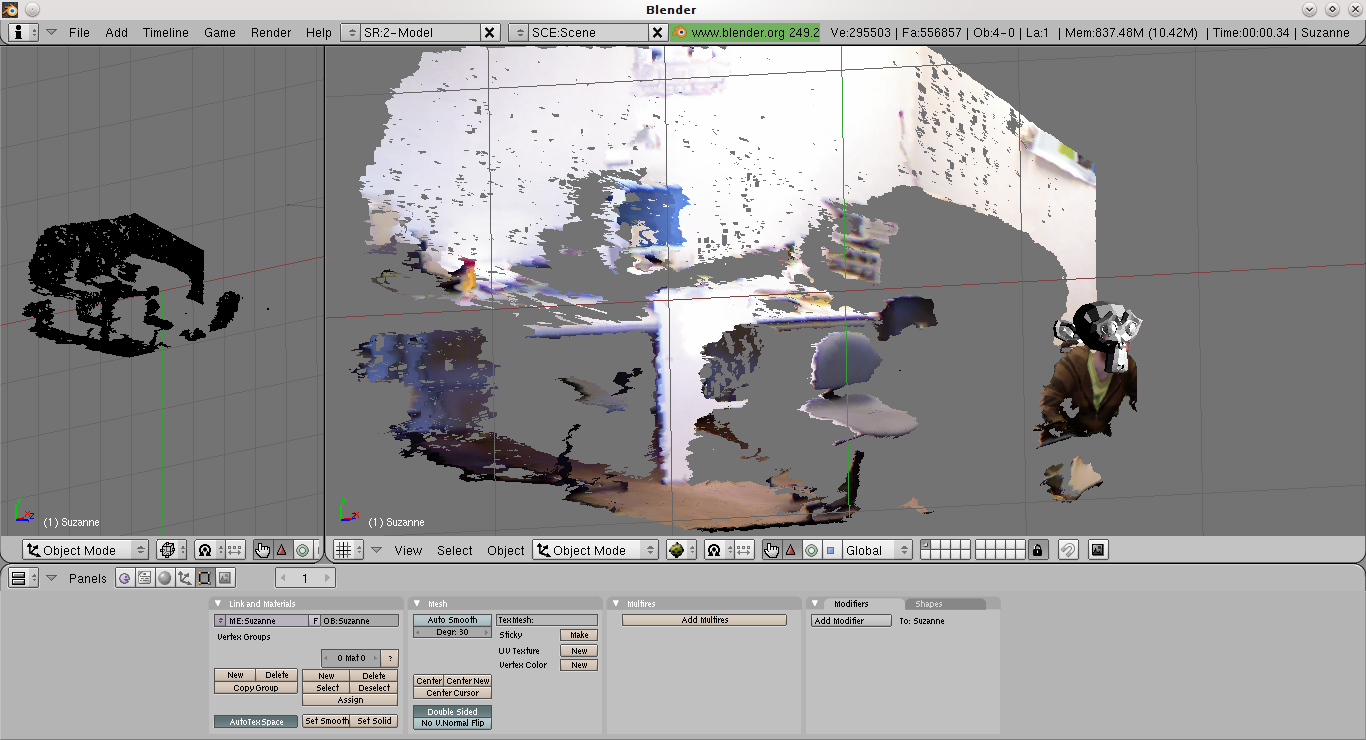
- The associated texture is written into a
current_mesh.ply.texture.pngfile and can be loaded into the UV editor in Blender.
Running the viewer
Running the demos
Running the viewer (rgbd-viewer)
Running the viewer
- Binaries are in the
build/bin/directory, you can give it a try without calibration using:
build/bin/rgbd-viewer
If you get an error such as:
libusb couldn't open USB device /dev/bus/usb/001/087: Permission denied.
libusb requires write access to USB device nodes.
FATAL failure: freenect_open_device() failed
Give access rights to your user with:
sudo chmod 666 /dev/bus/usb/001/087
Or install the udev rules provided by libfreenect.
Switching between backends
There are two supported backends for Kinect devices, libfreenect and Open NI?/Nite. By default, if the NESTK_USE_OPENNI Cmake variable is enabled, demo programs will choose the OpenNI backend. If you want to switch to the libfreenect backend, you can use the freenect command line option:
build/bin/rgbd-viewer --freenect
High resolution mode
When using the OpenNI backend, you can enable high RGB resolution mode to get 1280×1024 color images @ 10Hz with the highres option:
build/bin/rgbd-viewer --highres
Getting Infrared Images
- You can activate the IR mode in the capture menu. There is also a dual RGB/IR mode alternating between the two modes.
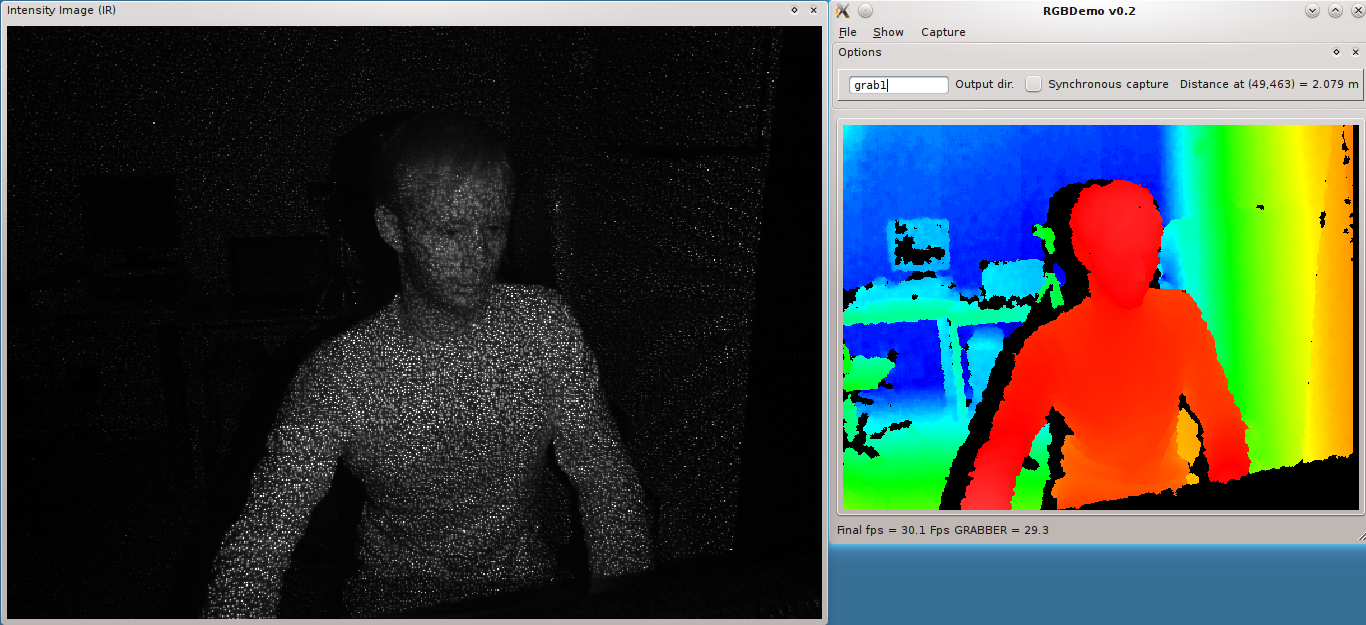
Note: this is currently only available with libfreenect backend
Moving the Tilt motor
This is only possible with the libfreenect backend. Open the Filters window and you can set the Kinect tilt on the bottom slider.
Replay mode
- You can grab RGBD Images? using the
File/Grab Framecommand. This stores the files intoviewXXXXdirectories (see the Calibration section), that can be replayed later using the fake image grabber. This can be activated using the—imageoption:
build/bin/rgbd-viewer --calibration kinect_calibration.yml --image grab1/view0000
- You can also replay a sequence of images stored in a directory with the
—directoryoption:
build/bin/rgbd-viewer --calibration kinect_calibration.yml --directory grab1
This will cycle through the set of viewXXXX images inside the grab1 directory.
Note: You will also need a calibration file if you used OpenNI backend to grab the images. You can get one by running the viewer and selecting File/Save calibration parameters.
Interactive scene reconstruction
- You can try an experimental interactive scene reconstruction mode using the
build/bin/rgbd-reconstructorprogram. This is similar to the interative mapping of Intel RGBD but still in a preliminar stage. The relative pose between image captures is determined using SURF feature points matching and RANSAC.
In this mode, point clouds will progressively be aggregated in a single reference frame using a Surfel representation to avoid duplicates and smooth out the result.
- Note: As of version 0.5.0, you can enable ICP refinement if
NESTK_USE_PCLcmake variable was enabled (by default on Linux) and using the—icpoption.
People detection
- Launch
rgbd-people-tracker. You need to specify a configuration file. Here an example of command line:
build/bin/rgbd-people-tracker --config data/tracker_config.yml
Calibration and config files will be loaded automatically is they are in the current directory.
Body tracking and gesture recognition
- Launch
rgbd-skeletor.
If you make the calibration pose, you should be able to see your joints. If you are interested into a minimal body tracking example, you can have a look at nestk/tests/test-nite.cpp. Enable the NESTK_BUILD_TESTS cmake variable to compile it.
Model acquisition of objects lying on a table
- Launch
rgbd-object. You might want to enable the—highresflag to get better color textures.
The Kinect must be looking at a dominant plane. Hitting “Acquire new models” should compute a 3D model for all the objects on the table. Note that objects that are too close to each other (about 5cm) might get merged into a single one. The models can be saved into individual objectXX.ply files using the @@Save meshes” button. On the right image you will see a reprojection of the models on the color image, along with the estimated volume of each object in mm3.
- Note: PCL support is required by this demo.